
Dust Collection In The American Craftsman Workshop
/I often get questions about my dust collection set up and so I thought that I would share it with everyone. The dust collection in my shop is simple and may even be a bit of a disappointment to see. But the reality is that it works pretty well except for a few shortcomings.
Currently I am using a single stage, 2hp, 1500cfm rated dust collector wired for 220v. It is a 110/220v motor, but when wired to 110v it would dim the lights every time I fired it up so 220v is the way to go.
 The dust collector and basic hose layout.
The dust collector came with a 30 micron cloth bag that worked OK for sawdust from the planer and tablesaw, but it just about killed me when I started using it on the sanding machine. The finest dust that comes off of the sanding machine would pass straight through the bags and go into my lungs. Using the original bag filter would result in three days of hacking up brown goo from my lungs, so I purchased a retro fit 1 micron pleated filter from Penn State Industries. These filters are well worth the money, they are amazing in comparison to the cloth bags.
You will notice that I have to use duct tape to seal the bottom bag onto the DC unit. This is one of the drawbacks if you purchase a dust collector and then a retro kit. The original setup was not intended to be used with the plastic bags and their particular needs for attachment. But this works OK, I just have to keep duct tape on hand.
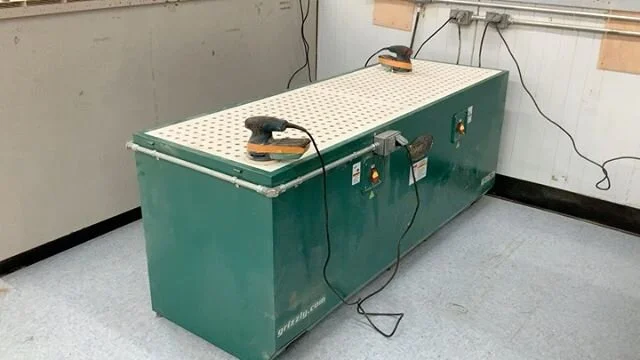
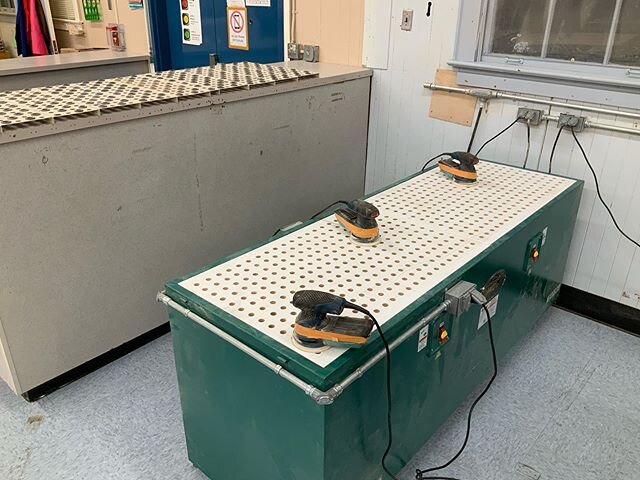
 Sanding machine dust collection.The dust collector is located closest to the sander because this is the most difficult machine to collect dust from. It has two ports and requires the most CFM. The 2hp motor provides enough suction but the biggest problem is that the dust collector is a single stage unit. For a sanding machine, a 2 stage DC unit is really necessary because it would help keep the filter clean for a longer period of time. I have plans to buy a cyclone but they are on hold at the moment. I know that I could use a garbage can with a cyclone lid and I may resort to this option.
 Planer and tablesaw dust collection.The CFM requirements for a surface planer and tablesaw are not as great as the sanding machine. A tablesaw is difficult to collect from if you do not leave the dust collection shroud around the blade. I do not have the shroud mounted on mine so I get a certain amount of dust that comes off of the tablesaw. With this understanding, the dust collection from my tablesaw is quite satisfactory.
 Tablesaw dust collection.
The dust collection system would benefit most with a smooth pipe run, but for the short distance I have to run a DC line, the corrugated hose works sufficiently without causing too much drop in the suction. I have a blast gate located at each tool and for my small system this works fine, I do not need to shut down whole runs to increase flow elsewhere.
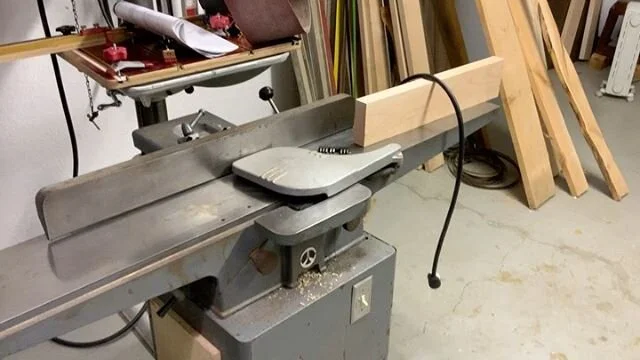
 Jointer dust collection.The jointer has it's own dedicated dust collector. It is a small 3/4hp, 660cfm unit with the cloth bags. This works good because the jointer does not produce fine dust overall, it produces shavings.
This small dust collector was actually my original. The bigger one came later but I kept the small one because using it worked out best for my shop layout and dust collection needs. I was glad that I kept it because a couple of times I hauled it to a remodeling jobsite. It's mobility has been a great asset to my business.
Both of the dust collectors are activated by remote control units. I find that these are a great investment for the shop. I have the Woodcraft and ShopFox brands and they both work great. When you make the purchase, just be sure that the remote unit will handle the HP load of the dust collector.
Dust Collection From Small Tools
I collect dust from my electric hand tools like the random orbital sander, belt sander, and biscuit joiner. But I will have to cover that setup with photos and a full write up at a later date;)
That is all for now.
Your friend in the shop - Todd A. Clippinger.
Share the Love~Share the Knowledge