
The Challenges Of Building A Rustic Office
/A Couple Of Challenges
The challenges of working with the material for this project are ever present.
One issue is the maintenance that this material causes and the biggest issue is the dimensional stability.
Maintenance
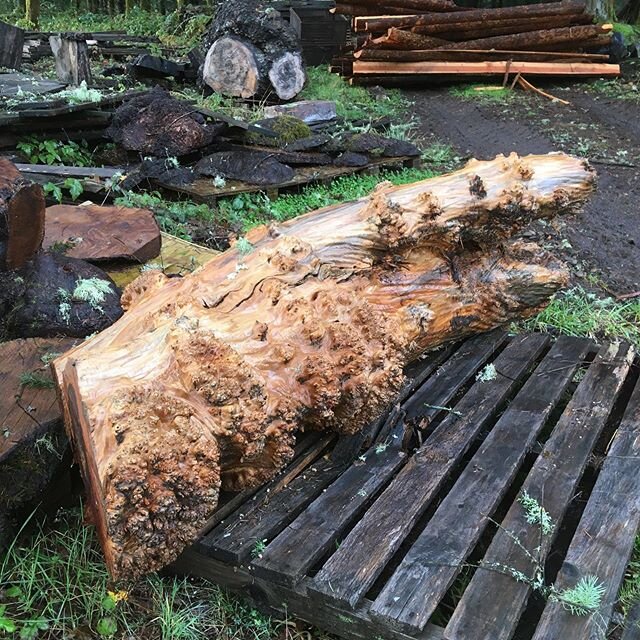
For the readers that are just joining us for this project, I am using doug fir beams left over from the construction of a timber frame home to construct an office desk and cabinetry for that same home. The beams are about 10 years old and have been laying outside, stickered on the ground, but unprotected.
Any day that involves milling this material to any extent results in cleaning tables, blades, and knives down with solvent. Most of the sap has crystallized over the years and does not bleed out but it leaves a mess none the less.
The table surfaces load up with a sticky wax residue that causes a lot of drag when pushing the material across the tool. This causes a bit of safety issue because a smooth sliding surface is safer than a sticky one when milling and cutting material.
Blades and knives of the tablesaw and planer will load up with the residue. This causes more friction and thus leads to an ever rapidly increasing build up of the pitch. It is a situation that quickly decreases the cutting efficiency of blades and knives. It has occurred on a regular basis that I have had to clean cutting edges and surfaces twice a day. While I did figure some time in the bid to do this, it has exceeded my estimations - lesson learned.

Cleaning tablesaw and applying TopCote.
I use solvent to strip the sticky residue from the tools and I like to apply a product called TopCote to the tools. This creates a slick tool surface that allows for smooth feed of materials. This product does not cause contamination that leads to adhesion issues or fish eye when applying the finish.
TopCote is sprayed on and then buffed off when dry, similar to waxing a car.
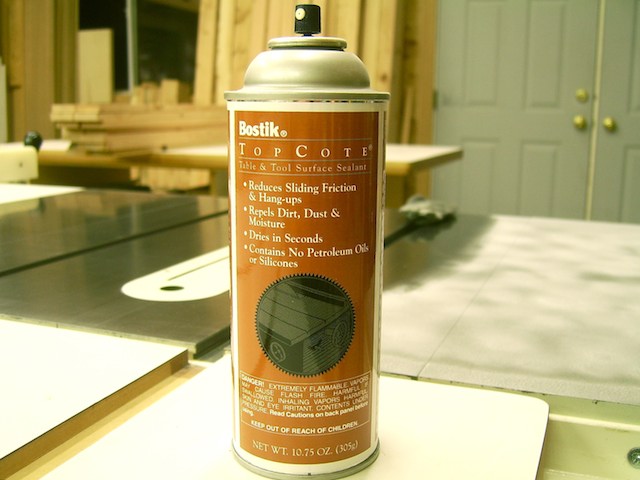
TopCote
Dimensional Stability
Dealing with dimensional stability has been a constant issue, but I will share with you what I have done to be as successful as possible.
Choose The Best Material Possible
I have been dealing with two sources of material, one is the original 10 year old beams and the other is new stock from the lumber yard. I took several moisture meter readings of both batches of material and have been following and observing them closely.

Old beams on bottom, new beams on top.
To be specific, the old beams had a moisture content anywhere from 21% up to 28%, but with most of it in the 21% to 24% moisture content range
The new doug fir stock had moisture content readings from 21% to 25%. the most frequent readings were 21% to 22%
Solutions To Avoiding Dimensional Issues
The first action to reduce dimensional stability issues was to choose the best cuts of material. For the old 10"x10" beams, I had them milled into quarters. The pith of the tree was nearly in the center of every beam and this automatically created quartersawn rough stock. As I continued to refine the stock I have paid close attention to the grain orientation to preserve the integrity of the quartersawn cut.
For the new stock I also picked the best quartersawn material I could find. You might be surprised to know that it is very possible to get really good quartersawn material off the shelf at the lumber suppliers. It will involve some digging but it is do-able.

Quartersawn 4x4's
As I continue to mill it down, I plan the cuts to maintain the quartersawn orientation.

Maintain quartersawn orientation throughout milling process.
Take It Down In Stages
Considering that both materials have different histories and origins, the same principle applies to both. Never mill the material down to the finished dimension right away, take it down in stages, always leaving it oversized. Milling the material open and then letting it relax allows it to acclimate and continue drying in a controlled manner.


Ripping down to the final rough stage.Planed but left a little oversized and time for one last rest.
Monitor Progress
If you are dealing with stock such as this, a moisture meter is a necessity.
You will need to know how to use it and how to accurately read the material. I have extra material cut in anticipation of the higher than normal loss rate. As the wood twists, I will use the bad pieces to cut open and measure on the inside.
If you take a moisture reading on the outside it may be extremely low, but keep in mind the meter will only read to a certain depth. If you have the opportunity to cut the wood open and read the inside at the center then you get a more accurate reading and understanding of what is going on inside the wood.

Meter reading 5.3 on outside face of stock.
You should do this to gain experience of using the meter and an understanding of what the numbers really mean.
Be sure to measure different boards in different locations. Remember that the readings will be low on the outside of the board, and if you cut it open, the readings will be highest near the center and lower near the ends even on the inside of the board.
Taking the readings and observing the behavior is the best experience that you can have to understanding the nature of wood.

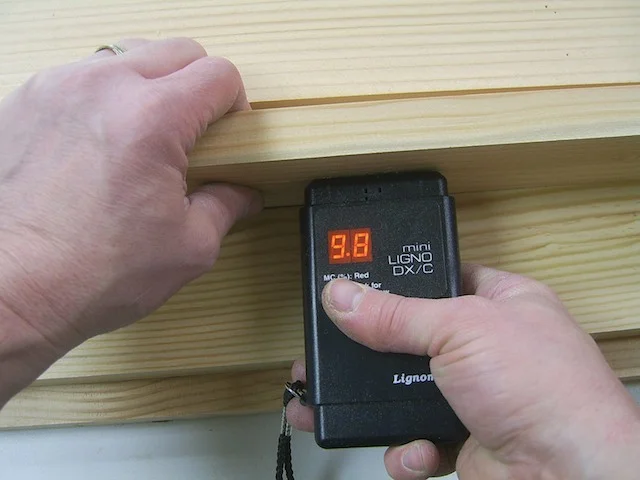
Meter reading 8.9 on freshly milled face of wood.Meter reading reveals 9.8 in the center of the board freshly milled open.
Don't be desparaged by differences, you are looking for an overall average. But also compare your readings to the individual characteristics of the board. This is valuable information that you will draw upon as you pick lumber in the future.
Mill & Rest
After cutting and planing this stock down to it's final dimension I need to let it rest one more time. This particular project has required more of this than normal. A low moisture content on one side and a high moisture content on the other will lead to a warped board. Letting it acclimate and dry a little more alleviates the problem.
Always sticker the wood to create space between the layers. Also be sure to leave some space on the sides to create as much air flow as possible. Never blow a fan on it to accelerate the drying and acclimation. You will cause the wood to wick out the ends at a much faster rate than the center can give up and this will cause checking on the ends and twisting. The wood does what the wood wants to do in it's own time.
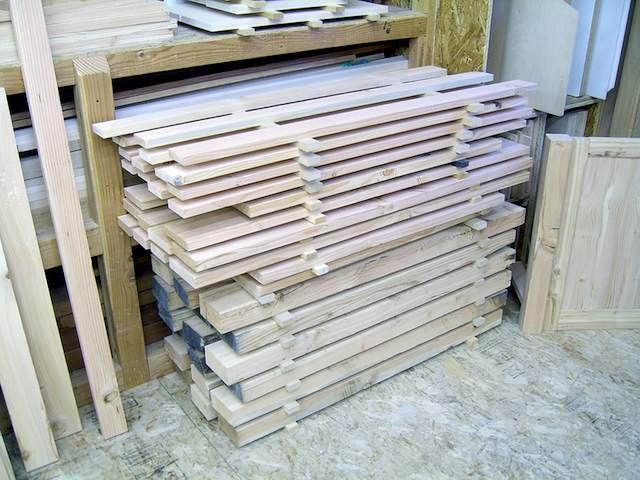
Stacked and stickered for what should be the final rest.
Do Not Introduce Too Much Moisture
During the glue up for particularly difficult material, do not use a lot of water to wipe away the glue squeeze out. This will have an adverse affect on the panels. Rely on scraping and sanding off the squeeze out to avoid adding moisture.
Sometimes It Can't Be Stopped
Sometimes you can do all the right things and it still doesn't work out in the end. While this is lost time and labor on one hand, use it as a lesson to understand what went wrong and why.
Sometimes you learn through success and sometimes you learn through failure. Even as a pro, the learning never ends.

Warped panels.
That's all for now. Be sure to check back often to see what's new.
Your friend in the shop - Todd A. Clippinger
Share the Love ~ Share the Knowledge